Showing posts with label Lesson. Show all posts

Friday, January 14, 2022

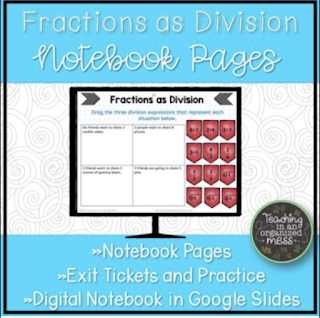
Fractions as Division Lesson-Introduction to Different Representations of Division

How to teach Fractions as Division?

One of the first lessons that I taught in six grade math was fractions as division. Getting students to understand that a fraction is also a division problem is a year-long struggle so introducing an early is necessary so that we can keep practicing it over and over and over again. 


I will admit that at the beginning of my career for teaching math, I was not too big on emphasizing math vocabulary. It’s one of those things that I will regret not doing well with my first class. For this lesson, emphasizing the vocabulary for division problems is super important to help students keep what number is what in a division problem. 

Remember from this post, that the best math lessons have students connect with the new learning with something that they already learned in the past. So we discuss vocabulary and look at the division representations that they already know using the division sign and the “house”. I have my students repeat over and over again which number in the problem is the dividend and which number in the problem is the divisor. Then we look at a fraction and students learn how the numerator is the dividend and the denominator is the divisor.

As we are setting up 3 representations of division, we repeat the vocabulary again. By the end of the lesson they are sick of saying the words dividend and divisor but repetition is key here.
   
This presentation is a jumping off point for a fraction as division lesson. From here I would continue to give students real world examples of division and have them write a division representations for those examples.

What are some common misconceptions with fractions as division?


One common misconception that students have is that the bigger number must always be the dividend. This is something that an elementary school teacher probably told them as an easy way to get them to remember to put the bigger number inside the house. This is a habit that middle school teachers have to help students break.

What is next with teaching fractions as division?


I have some other fractions as division resources available in my store. 

  • Here is a free puzzle where students need to match a real-world situation with the 3 division representations. 

Fractions as Division Puzzle
Fraction as Division Practice

Thursday, December 16, 2021

FREE Classifying Rational Numbers Lesson and Activities

How to Teach Classifying Rational Numbers?

I love teaching classifying rational numbers. I don’t know why I like it so much but I think part of the reason is that the students already know pieces of this lesson and I am just helping them connect things they’ve learned in math previously to this new skill.

Classifying Rational Numbers Lesson Preview

The best math lessons are the ones were students make connections to something they have learned before. Research shows that when students are able to make connections to things that they already know, then those new topics stick in their brain better.


This set of classifying rational number lessons has students use number lines and come up with their own definition of things like whole numbers, which they have been using since kindergarten.


This lesson plan was originally written to be used within a classroom that uses small groups. So you will see four days of lessons that should take 15 to 20 minutes each and then the teacher would pull small groups for intervention or extra practice on this topic. However, you could also condense the lesson into 2 to 3 days depending on the length of your class period. 


You can download the set of lessons here for free. The lesson plans are editable and there is also a set of activities that go with the lesson plans.


How to Practice Classifying Rational Numbers?


If you would like more ways to practice classifying rational numbers, I have tons of resources in my TPT store. I would use these additional resources for extra practice throughout the year, for homework, for substitute lesson plans, or for stations in a small group math classroom.


Classifying Rational Numbers Activities


Friday, May 29, 2020

Rounding Decimals Using a Number Line Free Lesson and Activities


When I was in school, I always felt that rounding decimals and estimating numbers was a waste of time. That’s because nobody ever explain to me how rounding and estimating could help me solve problems. There is a lot of math that needs to be precise in the real world however I find that most the math I do on a daily basis can be an estimate. I think that rounding and estimating help students become flexible with numbers. 

The lesson that I am sharing today is rounding decimals. This is a topic that students have previous practice when they learned how to round whole numbers. The Texas TEKS 5.2C reads “round decimals to tenths or hundredths.” The common core standard reads “use place value understanding to round decimals to any place.” 

Most of us have probably heard a rhyme that similar to “Five or more? Raise the score. Four or less? Let it rest.” I am not 100% opposed to teaching students a rhyme, however I think students need to understand why the rhyme works. If students aren’t able to connect the rhyme to anything they will be less likely to remember it. This lesson uses number lines to help students round. The last lesson I share, comparing decimals, also used number lines. Number lines are becoming one of my favorite math tools because they help students become more flexible with numbers. I will try to incorporate them as much as possible. 

You can download the lesson and activities here.  The lesson plan is in editable form for you to change as needed. 


Friday, May 15, 2020

Comparing Decimals to the Thousandths Free Lesson Plan and Activities


The lesson that I am sharing today is comparing in ordering decimals to the thousandths. In previous grade levels, students have compared and ordered decimals using models and they compared and ordered whole numbers using <, >, and =. This standard scaffolds into higher grade where students need to compare and order all rational numbers. Since rational numbers can be converted into decimals if students have a strong foundation and understanding decimals in their value than it will help them with the higher level comparing. 


The TEKS this lesson covers says "compare and order decimals to thousandths and represent comparisons using symbols >,<, and =."  The common core standard states "students will compare two decimals to thousandths based on meanings of the digit in each place using >, <, and = symbols to record the results of comparisons."

When you work with students comparing in ordering decimals you see what types of misconceptions they have pretty soon in the lesson a lot of students may feel that 0.49 is less than 0.432 because the second number has more digits. 

Anytime students are comparing two numbers I like to use a number line. Students have used number lines before and have placed numbers on the number line and I believe it is important for them to be familiar and fluent with how to place numbers on a number line. You can start by providing students with teacher created number lines but I think it is more beneficial for students to eventually create their own number lines. This lesson begins with students looking at a number line and placing numbers on the number line. 

You can download the lesson for free here. I left the actual lesson plans in Word form so you can edit it as need. 


If you would like any more resources for comparing decimals to come back to this topic for review throughout the year, you can check out these items in my TpT store. 


Tuesday, May 12, 2020

Decimal Place Value: Writing Decimals with Expanded Notation Free Lesson

Place value is such an important topic to make sure that students understand. 

It’s usually the first topic of the school year and sometimes it gets glossed over because the students easily complete the place value tasks they are given. However we need to make sure students truly understand place value. 


One of the first math lessons of the year for a Texas 5th grade student is writing decimals in expanded notation. The TEKS reads that "students will represent the value of the digit in decimals through the thousands using expanded notation and numerals." Expanded notation was first introduced to students in third grade and in fourth grade they wrote numbers in expanded notation through the hundredths. In fifth grade we are adding writing numbers using expanded notation through the thousandths. 

This is not a lesson I would spend more than 2 to 3 days on because you can spiral it throughout the year in warm-ups and homework and in-class station. The lesson I’m sharing with you today has the following components: 
  1. Activates prior knowledge by asking students to read and write numbers 
  2. Has a pre-assessment to determine where students are at with writing expanded notation 
  3. Introduces the thousandths place value using a place value mat 
  4. Gives opportunities to practice writing expanded notation and writing numbers in standard form from expanded notation with a station, assessment, and practice.


Each day's lessons are short but can also be extended if needed. I always jump into math lessons by the second or third day of school and continue to teach my routines and expectations through the lessons I am teaching--post about that coming soon. 

Here are some more place value resources available in my TpT store to be used for extra practice throughout the year. 


Saturday, January 19, 2019

Fraction Decimal Percent--Equivalent Numbers Practice Freebies

I feel like it takes students all school year and then some to remember how to convert between fractions, decimals and percents.

In Texas, we start with generating equivalent numbers in 6th grade: the time when some teachers and students think math manipulatives and models are no longer needed. I strongly disagree. I struggled with math in school (which I believe is what makes me love teaching math now) and I don't ever remember working with math manipulatives or math models. No fraction models, algebra tiles, cuisenaire rods, etc. When I started teaching and understood the models myself, I understood the concepts so much better. The first time I saw dividing fractions modeled with cuisenaire rodes in grad school, I was blown away!

All this to say, don't think 6th graders (or older) are too old for models and manipulatives. Some students may not need them and other will. But don't make that call for them.

When it comes to generating equivalent forms of fractions, decimals, and percents, students have a hard time understanding that the numbers really are equivalent. They are different ways to tell the same story. So I always start with models.

At this point students have worked with fractions and decimals and have probably heard to percents, but don't understand what they are. I start with a mini presentation to get the conversation going about what percents are. (Click the link to make a copy to your Google Drive)


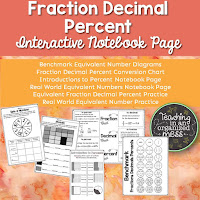
And we practice. Over and over and over again. I use notebook pages like this that students can refer to as they practice.

Practice starts simple. I write fraction, decimals, and percent on index cards, pull students to work in small group, give them so dry erase markers and start converting. They work the problems on the small group table and I get to see where students are running into problems.

Fraction Decimal and Percent conversion is a skill that students revisit all year long, so I need lots of different ways to keep students practicing. Download this sheet here  for more practice. 


Other Fraction, Decimal, Percent Resources


Wednesday, December 26, 2018

Moon Phases, Seasons, and Shadows TEKS 4.8C

5th grade science teachers in Texas need to spend some time reviewing/reteaching some 3rd and 4th grade science TEKS in addition to the 5th grade TEKS. 

Science TEKS 4.8C says "Collect and analyze data to identify sequences and predict patterns of change in shadows, seasons, and the observable appearance of the Moon over time."

This TEKS has been tested once in the last 4 years and it was over tides--which was dropped from the TEKS this year. It isn't enough for students to know what causes these events but they should be able to look over data and predict. 

Moon Phases
This video shows all the moon phases from 2017.  
  • Ask students what they notice and wonder after watching the video. Do they see a pattern after watching it?
  • Give students a calendar with some of the moon phases filled in for the month. Have them complete the calendar based on the pattern they see. 
Seasons 
Use this file to assess what students remember about the different seasons. There are 24 cards. Give each student one card and they can walk around the room meeting up with their classmates. When they meet another classmate, each students will share the characteristic on their card and discuss what seasons they believe it belongs in. At this point, they can switch cards and then find another partner. At the end of the activity, create a chart and have students place their cards in the correct season. 

Shadows
Students need to understand how shadows are formed (because light travels in a straight line and when light hits an object, that object may block the light) and they need to understand that shadows form a predictable pattern. You can put an object outside and predict where the shadow that object creates will be. 

This activity lets students practice where the shadow is. It also doubles as an activity for 5.8C which is about Earth's rotation. Place the page with the tree in a sheet protector. Have students label the time for each of the Sun's position. Then have them draw where the tree's shadow will be with a dry erase marker at any given time. 

__________________________________________________________________________

All three of these patterns can be summed up with this free foldable found in my TpT store. 


Friday, August 12, 2016

Mathematical Mindsets--Jo Boaler

This should be required reading for anyone who teachers math--from PK to College, from teachers to parents. (affiliate link below)


This book will change how I teacher math this year from the very first day of school. I will continue to blog about how things are going in my classroom, but here are a few bullet points of my main takeaways. 

  • I am going to talk with my kids about brain research--not just once--but several times throughout the year and heavily the first two weeks of school. I have to change their mindset about math and their selves. 
  • Homework will look extremely different. Jo Boaler says "homework perpetuates inequities in education." She even talks about how her family has two working parents and after everyone is home and fed for the evening, she wants to spend time with her daughters-not in frustration over homework. My homework was very light in the past, but this year it will be more reflections questions and maybe 1 problem to start on that we finish discussing in class. 
  • "No one is born knowing math, and no one is born lacking the ability to learn math."
  • Mistakes are necessary!
  • My grading will look different--if mistakes are necessary, I can't punish students for making them. 
  • Mental Math will improve--I especially want to show students ways to think about numbers to improve their number sense.
  • Boaler talks about using tasks that are "low floor, high ceiling." Everyone can access the task and anyone and take it further. 
One www.youcubed.org--which is a website Jo Boaler is part of--there are two weeks of inspirational math with videos and activities designed to help students change their mindset about math. What I like most about the activities is they are "low ceiling, high floor" but they also give students practice to work together in math. Math should be a very social subject. I will be using (and blogging about) several about the activities the first two weeks of school. 

Wednesday, March 30, 2016

Area of Polygons Practice

After the students learned the area of triangles, parallelograms, and trapezoids, they needed to practice.

It would be easy to give them a worksheet with the shapes on it and all the measurements given and they just have to plug the numbers into the formula the solve.

Worksheets can be useful, but when there is a way to not do a worksheet, do it.

I did this activity last year and wish I would have saved all the shapes I made. So I remade them again and laminated them.

I drew 10-12 triangles, parallelograms, and trapezoids each. I spread them around the room and asked the students to find the area of the shapes. They measured everything to the nearest centimeters.

To make them talk to each other about it, I asked them to verify their answers with their classmates. I put a large poster at the front of the room with a table of the shapes. Once students have verified their answers with 3 other classmates, they could start adding the area of the shapes to the poster.


Once I made and laminated all the shapes, the activity was easy to put together. I didn't even use any copies! Just notebook paper.

If you dont want to draw your own shapes, you can use this file here. Download it for free. 


Here is another way for students to practice finding the area of polygons fro my TpT store. 
.


In Texas, 6th graders are to "determine solutions for problems involving the area of rectangles, parallelograms, trapezoids, and triangles and volume of right rectangular prisms where dimensions are positive rational numbers." 


Monday, March 28, 2016

Decomposing a Trapezoid--Finding the Area

This has been one of my most favorite and wonderful lessons of my entire teaching career. My students pleasant surprised me with how awesome they are.

Students need to be able to explain how shapes can be decomposed into other shapes to find the area--that is how the formulas are derived.

There are several different ways trapezoids can be decomposed and rearranged to make other shapes. Before this lesson, the students had a guided lesson to decompose parallelograms to rectangles and triangles to parallelograms. So they had previous experience with cutting and rearranging shapes.

I wanted to see if they could take what they had done and apply it to trapezoids.

And they did awesome.

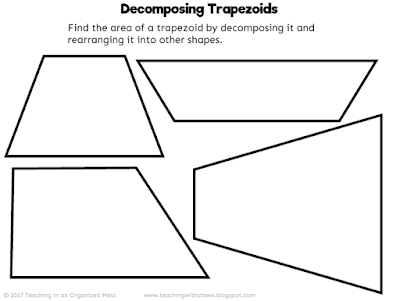
I gave them a sheet of trapeziods and a ruler. I asked them to pick any trapezoid and find a way to decompose it, rearrange it, and find the area.

My advanced class found 8 different ways to find the area. My on-level class found 5 different ways.

I don't have the list we made in front of me, but these are some of the ones I remember they were able to find.

  • Cut the trapezoid by the diagonal to make two triangles
  • Cut off two triangles at the ends to make one square and one rectangle
  • Cut off one triangle and you have a triangle and a rectangle (When one of the sides of the trapezoid is also the height
  • Cut the trapezoid by the height, rearrange and make a rectangle
  • Double the trapezoid to make a parallelogram
  • Cut off one triangle, add to the other side to make a rectangle

After the students spent some time exploring, I had students share what they found. We looked at the measurements of the original trapezoids and of the new shapes they created and found some patterns.

Sometimes, the new base was in between the two original bases(specifically it was the average of the two bases). When you had a triangle, you used the formula 1/2bh and added to the area of the other piece. If you doubled the trapezoid, you would have to half the area of your new shape. 

The last step was to write a formula that they could use to find the area of a trapezoid so they wouldn't have to decompose a trapezoid every time they wanted to find the area. I'll need to improve this part of the lesson. Students got the adding something, the multiplying the height and either multiplying by 1/2 or dividing by 2, just not in a way that would work. 

It was a fun lesson and I was walking around so excited all day long because they were doing such a good job trying and finding ways to decompose the trapezoids!


If you want pdf of the printable with the trapezoids, you can download it here


If you want some notebook pages that show decomposing shapes to find the area, I have some in my store. 


Monday, March 7, 2016

Triangle Inequality Theorem

This is the second year I have taught the Triangle Inequality Theorem using spaghetti and I love doing it this way. 

First I had students copy the table into their notebook and gave them a piece of spaghetti. Their instructions were to break it into three uneven pieces, measure the three pieces, and record their measurements under the columns short side, medium side, and long side. (I asked them to do three uneven pieces because last year too many students broke them into the exact same length and it was more difficult to illustrate the concept)
As the students were measuring, I was walking around the room asking students to write their measurements on the board. I looked for a mixture of those who lengths that would make a triangle and those who did not. I asked a few students to come to the board and share their triangle lengths. 

BEFORE filling out the short + medium column, I ask students to try to make a triangle with their pieces. I asked the students who wrote their measurements on the board if their length pieces made a triangle and we added a "yes" or a "no" to the last column.

I didn't have the column labeled Short+Medium yet. So with 4/5 columns filled in, I asked the students to look for a pattern. Some classes were able to see that when two small side lengths were more than the large one, there was a triangle.

For the class that did not come to that conclusion, we added the short+medium, then added up those two sides and I asked them to look again.

It is one of my favorite lessons of the year. After we determined what the Triangle Inequality Theorem says, we put this foldable into the student notebooks.  My students did really well explaining when a triangle could be formed.

This foldable is now available in my store. 


Friday, January 1, 2016

Mathematical Mindsets--Jo Boaler

This should be required reading for anyone who teachers math--from PK to College, from teachers to parents. (affiliate link below)


This book will change how I teacher math this year from the very first day of school. I will continue to blog about how things are going in my classroom, but here are a few bullet points of my main takeaways. 

  • I am going to talk with my kids about brain research--not just once--but several times throughout the year and heavily the first two weeks of school. I have to change their mindset about math and their selves. 
  • Homework will look extremely different. Jo Boaler says "homework perpetuates inequities in education." She even talks about how her family has two working parents and after everyone is home and fed for the evening, she wants to spend time with her daughters-not in frustration over homework. My homework was very light in the past, but this year it will be more reflections questions and maybe 1 problem to start on that we finish discussing in class. 
  • "No one is born knowing math, and no one is born lacking the ability to learn math."
  • Mistakes are necessary!
  • My grading will look different--if mistakes are necessary, I can't punish students for making them. 
  • Mental Math will improve--I especially want to show students ways to think about numbers to improve their number sense.
  • Boaler talks about using tasks that are "low floor, high ceiling." Everyone can access the task and anyone and take it further. 
One www.youcubed.org--which is a website Jo Boaler is part of--there are two weeks of inspirational math with videos and activities designed to help students change their mindset about math. What I like most about the activities is they are "low ceiling, high floor" but they also give students practice to work together in math. Math should be a very social subject. I will be using (and blogging about) several about the activities the first two weeks of school. 

Thursday, November 5, 2015

Order of Operations Errors-Order of Operations Error Analysis Activity

We've been working on Order of Operations this week and my students have the Order part down, but it is the Operation part they need some help with. 

I did an activity where I asked students to purposely make a mistake when evaluating the expression. Then the class had to find their mistake.

Flat lay with arranged various school appliances on pink says Order of Operations Error Analysis
Order of Operations Error Analysis


My students LOVED this. It went over so well and they all wanted to go up several times to try to stump their classmates with the tiny little error they made. 

Eventually, I found 3 students who had evaluated the expressions in 3 different ways and then had the class explain their mistakes. 

They made mistakes with the exponents, solving in the wrong order, ignoring grouping, not regrouping when adding and subtracting, etc. It shows that they know what type of errors are common and will hopefully be on the look out for it. 


I have a station that I will pull out next week where the students will get an expression solved two different ways and will have to sort them into correct and incorrect. That station is available in my store. If you have it, make sure to re-download it because I made some updates to it. 


Sunday, November 1, 2015

Order of Operations

I am starting order of operations with my students tomorrow and Tuesday. I prefer not to just jump into algorithms with students without hooking them in or giving them some kind of real-world reason they are learning a new skill. 

Before teaching, my understanding of order of operations was the some people made some rules, decided that multiplication had to be done before addition and we all just blindly follow. Who "they" were was unclear to me. 

When we teach order of operations by just giving an expression and asking students to evaluate it, that is essentially what we are teaching: We are saying that these are just some rules you need to memorize. 

However, as I tell my students, in the real world there aren't signs that make you solve a math problem before you enter a room. Or you don't have to prove you can multiply before you take your driver's test. Instead, math comes up and you have to be able to take all you have learned and decide what is useful in that situation. 

So instead of telling students the order of operations, I introduce them to real life situations and ask them to write numerical expressions that tell the story with numbers. Then I ask them to evaluate those expressions using the knowledge they have of where the expression came from. My students learned order of operations last year without exponents, so they are not completely new to it.

I have created a presentation on Google Slides that will be the lesson I do with my students. 


Use it if you would like. If you would like to make changes to it, go to File and then Make a Copy for yourself to save to your Google Drive. 

Prime Factorization

The students started prime factorization this week. 

I was unfortunately sick on Wednesday and ended up missing school that day. It was the first unplanned absence I had in 5 years. It was agonizing on Tuesday night trying to predict if I would feel better the next day. There were many cons to calling in. Mostly, the students would miss a day of new instruction. I had an emergency sub basket all ready with work for them, but it was just practice. Also, I would miss our class picture. In the end, the sickness won and it is good I did stay home. I ended up losing 5 pounds in one day to being sick. I was miserable. 

So my prime factorization lesson seemed rushed as I was trying to make up for a lost day. But I tried to vary the activities the students did, and gave them time to talk about the math. 

We started the lesson with reviewing what prime and composite numbers were. We talked about definitions, debate over which numbers were prime and composite and watched this video.

In one class, we had to talk in length about the difference between a multiple and a factor. 

Then we added a page to our notebook about prime factorization that looked like this. 


The tree flips down and there is another practice factor tree underneath. The students then got a practice sheet to work on with their group which we then checked. 

Afterwards, I gave everyone a dry erase marker and they practiced making factor trees on their desks while I went around checking and asking questions. 

Some common mistakes I saw were wanting to make the prime factorization smaller. Like taking 2x3x5 and wanting to collapse it to 6x5. We would go back to the definition of prime factorization and ask ourselves if all the numbers were prime. Also, some students just did the factor tree and thought they were done. I had to remind them that the factor tree was the process, not the actual prime factorization. 

Next, I will pull students in small groups and practice so I can really who has it and who needs more help. 

One station I will have next week while I pull students in small group is this Prime Factorization Match Up with QR codes. I try to have many of the stations that my students do include instant feedback. I am actually much better at grading this year than I have been in the past, but it is still not same day grading. Students need to know if they are doing it correctly. This way, they can check right away. Plus they'll have an ipad which they still think is cool. 


Sunday, October 25, 2015

Multiplying Fractions with Models

My students have a difficult time interpreting fraction word problems. And I do not blame them. I have a difficult time interpreting fraction word problems when it involves multiplication and division.

To help them practice, we draw pictures and models.

We start our lesson with folding patty paper. The paper that is between hamburger patties. It is a square and thin. We divide the paper as it says, shade in the fractional parts in different colors, and then where the colors overlap is your answer. (I'll be recording a video showing the process later.)

This was another teacher's patty paper. I like how she identified the parts of the fractions with the sections. 
For multiplying fractions, I also pull the fractions we are multiplying from word problems. I want students to connect the process with some context so it is not brand new to them. 

I created this notes page that I am looking for some feedback on. I've already taught this lesson this year and combined some different elements to fit on one notebook page. I hope to use this guided math page next year, and maybe even later in the year as we review for the state test. 


It is free on Teachers Pay Teacher right now. If you download it and use it, please let me know what you think. 

Friday, October 23, 2015

Age and Absolute Value


I read about an activity this summer to introduce absolute value to my students. It came from a Dan Meyer blog post

I introduced this as a game. I posted pictures of celebrities and students guessed their age. Then I posted the real age of the person and student recorded that next to their guess. 


We had to decide as a class who the winner was. I asked the students how we could decide. Depending on what students came up with at first, I would prompt them with questions. 

Eventually, I wanted them to say that they would calculate the difference by subtracting the guess from the actual age. If their guess was under, they would have a negative score. If they guess over they would have a positive score. 

Now, we had to decide who was closer. If we added all the scores, then the negatives and positives together would make the score seem less than it actually was. 

So now, I needed the students to decide to just calculate how far away from the real age they were. If they guessed the right age, their score would be zero. If they guessed one year over or under, their score would be one. Then I would connect this to absolute value and the number line. Again, depending on the class and what the students said, I had to guide them through questioning. 

Here is the Google presentation I use. You can see it and Make a Copy if you want to make any changes and have one for yourself. Go to File, then Make a Copy and it will be saved to your Google Drive. 

(If you aren't using Google Drive, you should be. I hated it at first, but I love it now). 

I did have a picture and my age in the original one. If you are comfortable sharing your age, you could add your own. 


Related Posts Plugin for WordPress, Blogger...